MIP Label Monitoring Policies
To view MIP labels, you must activate label monitoring and let the Agent know the tenant ID(s) assigned by Microsoft. In the configuration, you provide a name for this tenant ID that is easy to identify when it appears in the Diaries, alerts etc,. You can assign one primary tenant and up to 4 Other Tenants if needed. Generally the Primary Tenant is your organization's tenant. You might use Other Tenants for subsidiaries or divisions of your organization. (Any changes to the configuration -add/change/delete a tenant - are saved in the log of the ObserveIT internal auditing system, see Auditing ObserveIT.)
You must turn enable MIP label monitoring in the Recording Policy, see File Activity Monitoring Global Settings.
Setting up a MIP Label Monitoring Policy
-
Select Configuration > Endpoint Management > Recording Policies and select the MIP Label Monitoring tab.
-
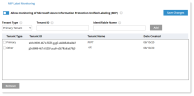
Turn on Allow monitoring of Microsoft Azure Information Protection Unified Labeling (MIP).
-
From the Tenant Type dropdown, select Primary Tenant or Other Tenant. You can add 1 primary tenant and multiple other tenants.
-
In the Tenant ID field, enter the relevant Tenant ID number. This ID is provided for your organization by Microsoft. To find your tenant ID, go to the https://www.whatismytenantid.com/ or the Microsoft Azure Portal.
-
In the Identifiable Name field, enter a name to display for the tenant. (This label will display on next to the MIP label when there are multiple MIP labels.)
-
Click Save Changes.
-
To remove a tenant, select it and click Remove.

Related Topic: