Creating a Self-Signed Digital Certificate
This topic provides instructions on how to create a self-signed SSL digital certificate (for Windows Server 2012 R2/2016/2019) for securing communication between the ObserveIT Agents and the Application Server, and between the Application Server and the Database Server.
On Windows Server
-
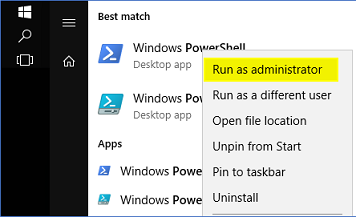
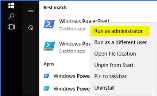
Start Windows PowerShell in Elevated mode, by right-clicking the PowerShell icon and choosing Run as administrator.
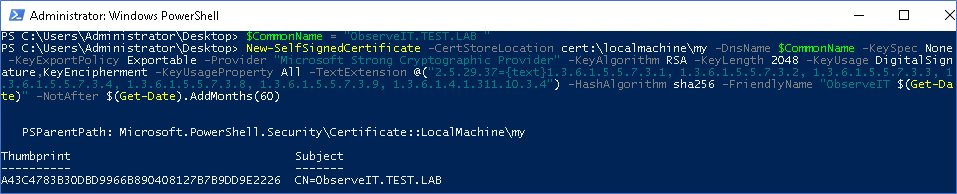
- Paste the following command to the Powershell window and press <Enter>:
$CommonName = "ObserveIT.TEST.LAB"
New-SelfSignedCertificate -CertStoreLocation cert:\localmachine\my -DnsName $CommonName -KeySpec None -KeyExportPolicy Exportable -Provider "Microsoft Strong Cryptographic Provider" -KeyAlgorithm RSA -KeyLength 2048 -KeyUsage DigitalSignature,KeyEncipherment -KeyUsageProperty All -TextExtension @("2.5.29.37={text}1.3.6.1.5.5.7.3.1, 1.3.6.1.5.5.7.3.2, 1.3.6.1.5.5.7.3.3, 1.3.6.1.5.5.7.3.4, 1.3.6.1.5.5.7.3.8, 1.3.6.1.5.5.7.3.9, 1.3.6.1.4.1.311.10.3.4") -HashAlgorithm sha256 -FriendlyName "ObserveIT $(Get-Date)"

Important Notes:
You must run the command on the ObserveIT Application Server.
Make sure that you enter the correct FQDN for the $CommonName variable.
The certificate is valid for 12 months. If you would like to extend the certificate validity beyond 12 months, append the following parameter to the last command in the file:
-NotAfter $(Get-Date).AddMonths(<months>).For example:
$CommonName = "ObserveIT.TEST.LAB"
New-SelfSignedCertificate -CertStoreLocation cert:\localmachine\my -DnsName $CommonName -KeySpec None -KeyExportPolicy Exportable -Provider "Microsoft Strong Cryptographic Provider" -KeyAlgorithm RSA -KeyLength 2048 -KeyUsage DigitalSignature,KeyEncipherment -KeyUsageProperty All -TextExtension @("2.5.29.37={text}1.3.6.1.5.5.7.3.1, 1.3.6.1.5.5.7.3.2, 1.3.6.1.5.5.7.3.3, 1.3.6.1.5.5.7.3.4, 1.3.6.1.5.5.7.3.8, 1.3.6.1.5.5.7.3.9, 1.3.6.1.4.1.311.10.3.4") -HashAlgorithm sha256 -FriendlyName "ObserveIT $(Get-Date)" -NotAfter $(Get-Date).AddMonths(60)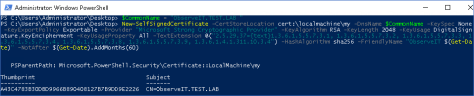
- After running the command, you can apply the new certificate to the Site Bindings/Site Headers of the ObserveIT website.

On Windows Server 2012 R2
-
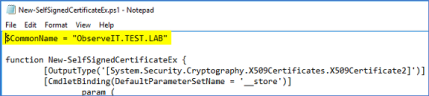
Download the New-SelfSignedCertificateEx.ps1 PowerShell script.
- Edit the script. In the first row, change the variable $CommonName to the FQDN of the server on which the certificate will be installed. For example: observeit.test.lab.
- Start Windows PowerShell in Elevated mode, by right-clicking the PowerShell icon and choosing Run as administrator.
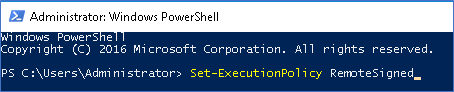
- Run the following command: Set-ExecutionPolicy RemoteSigned and confirm the request.
-
Navigate to the folder where you saved the script from Step 1.
- Run the script. For example: PS C:\Users\Administrator\Desktop> .\New-SelfSignedCertificateEx.ps1.
Important Notes:
You must run the command on the ObserveIT Application Server.
Make sure that you enter the correct FQDN for the $CommonName variable.
The certificate is valid for 12 months. If you would like to extend the certificate validity beyond 12 months, follow these steps:
Edit the script you previously downloaded.
Navigate to the end of the file.
Append the following parameter to the last command in the file: -NotAfter $(Get-Date).AddMonths(<months>).
For example:
New-SelfSignedCertificateEx.ps1 -Subject "CN=$CommonName" -StoreLocation LocalMachine -FriendlyName "ObserveIT Application Server $(Get-Date)" -ProviderName "Microsoft Strong Cryptographic Provider" -SignatureAlgorithm sha256 -Exportable -NotAfter $(Get-Date).AddMonths(60)
- After running the script, you can apply the new certificate to the Site Bindings/Site Headers of the ObserveIT website.