Creating Lists
This topic describes how to create new Lists.
The following steps are required:
-
Access the Create List page.
-
Define the general properties for the List (List Details).
- Define the content of the new List (List Items). The content of the List will depend on the list type: General or Users.
You can add users and groups (of users) to a Users type List; you can also exclude specific users and groups from a list of Users type items.
A user can be either an Active Directory user identified with a domain name that exists in Active Directory, or any user identified with a domain that exists in Active Directory or any other domain (for example, a local user whose domain name is the computer name).
-
Save your settings.
To access the Create List page
-
In the Manage Lists page (Configuration > Lists), click the New List button.

The Create List page opens in which you can define the general properties (List Details) and the content (List Items) of the new List.


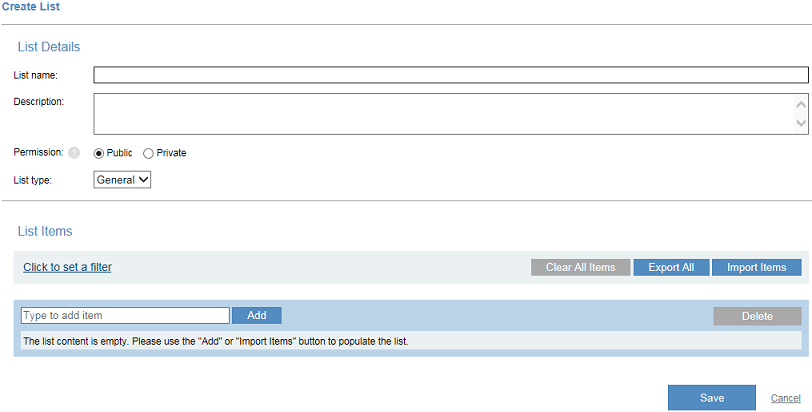
Defining the List Details
-
In the List Details area:
-
Enter a unique name for the new list (up to 64 characters).
-
Enter a description for the list (up to 512 characters).
-
-
Select the Permission for the list - Public or Private. By default, the list is Public when creating a new list.
The content of Public lists can be viewed and edited by everyone, whereas only the Console user that created a list as Private can view and edit its content.
-
Select the category to which the new list belongs - General or Users.
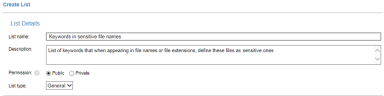
Following is an example of list details for a General type list:
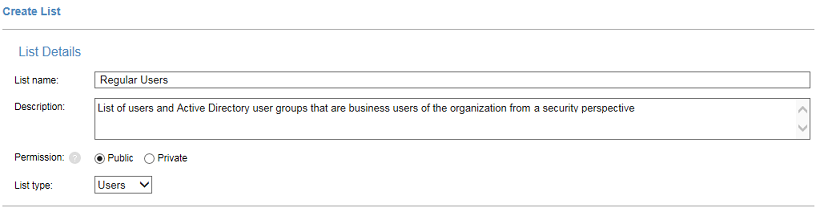
Following is an example of list details for a Users type list:


Adding Items to the List
The 3 buttons above and to the right of the List Items table enable you to:
|
|
Clicking this button allows you to delete all items included in the list, including those that are visible on other pages (via paging control). Note: When excluding users and groups from lists, all included and excluded items will be cleared. |
|
|
Clicking this button enables you to export the content of the list to a file. A CSV file is created in the format: List - <list name> - YYYY-MM-DD—HH-MM. For details, see Exporting List Items. |
|
|
Clicking this button enables you to import list items from a .csv file. For details, see Importing List Items. |


You can use the Add button or Import Items button to populate the list. The following procedure describes how to populate the list by using the Add button. For details on how to populate a new list by importing items, see Importing List Items.
To add items to a General list type
-
In the List Items area:
Enter the required item name (up to 256 characters) and click the Add button. Note that List items cannot contain the comma "," character.
You can also add items by entering the required name, and pressing <Enter>.
-
Repeat the above step for each item that you want to add to the List. Note that by default, you can add up to 20,000 items per list.
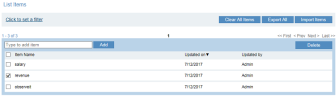
For example:
-
If required, you can filter the table display by clicking the Click to set a filter hyperlink; a text field will be displayed enabling you to enter the name of the item by which you can search.
The table displays the following information for each item:
-
Item Name: the name of the item.
-
Updated on: the date the item was updated/created.
-
Updated by: the Console User that last updated or created the item (or System if the item was defined in the ITM On-Prem (ObserveIT) Insider Threat Library).
-
-
You can sort the order of the items by clicking on any of the above 3 column headers. By default, the items are displayed in reverse chronological order, so that the most recently updated (Updated on) item appears at the top.
You can remove an item by clicking the Delete icon
 that appears when hovering over an item in the table or by selecting the check box next to the item and clicking the Delete button. You can also delete multiple items by selecting the check box next to Item Name and clicking the Delete button.
 -
When you have finished populating your newly-created list, click Save to save your changes.


To add items (users) to a Users List type
-
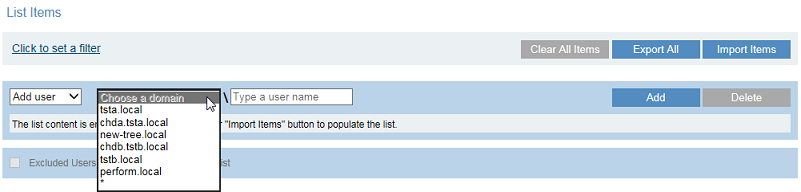
In the List Items area, from the drop-down list, select whether to Add user (i.e., Active Directory user or any-domain user) or Add group (i.e., Active Directory group).

If you selected Add user:
-
Select the domain from the drop-down list (or "*" for all domains), enter the user name, and click Add.

- Repeat the above step for each user that you want to add to the list.
If you selected Add Group:
-
Select the domain name from the drop-down list (a specific domain or any "*" domain), enter the Active Directory group name, and click Add.
If you select a specific domain name, it must exist in the predefined Active Directory LDAP Target list in the LDAP Settings; otherwise you will receive an error. For details, see LDAP Settings Configuration.
-
Repeat the above step for each Active Directory group that you want to add.
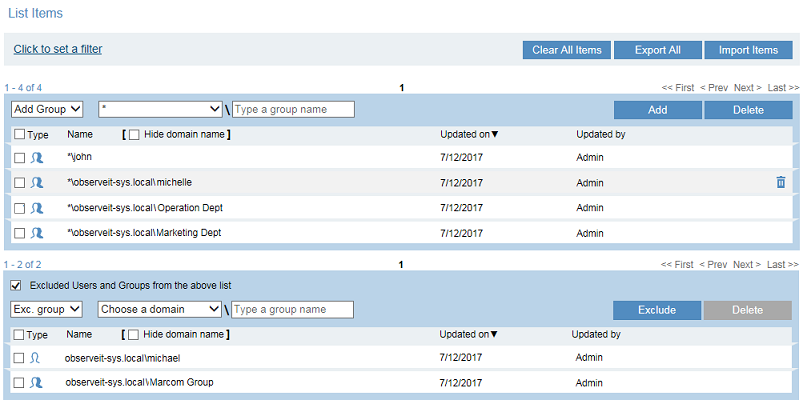
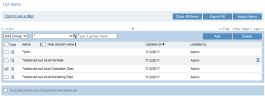
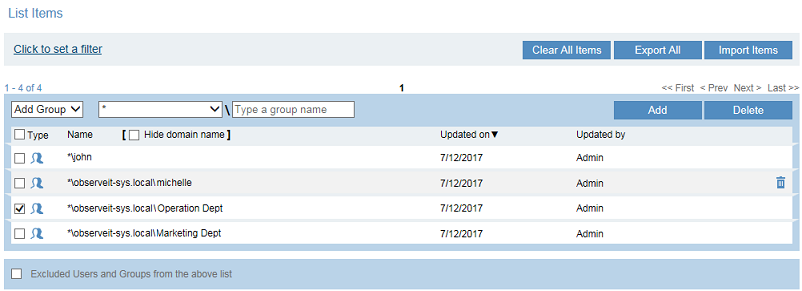
The defined users and user groups will appear in the table, as shown in the following example:
If required, you can filter the table display by clicking the Click to set a filter hyperlink; a text field will be displayed enabling you to enter the name of the item by which you can search.
For each item in the table, the following information is displayed:
-
Type: an icon that indicates a User or User group.
-
Name: the defined domain and user/group name.
If you want to display only user names, you can select the Hide domain name check box.
-
Updated on: the date the item was updated/created.
-
Updated by: the Console User that last updated or created the item (or System if the item was defined in the ITM On-Prem (ObserveIT) Insider Threat Library).
You can sort the order of the items by clicking on any of the above 4 column headers. By default, the items are displayed in reverse chronological order, so that the most recently updated (Updated on) item appears at the top.
You can remove an item by clicking the Delete icon
that appears when hovering over an item in the table or by selecting the check box next to the item and clicking the Delete button. You can also delete multiple items by selecting the check box next to Item Name and clicking the Delete button. -

To exclude specific users or groups from the list of items
-
Select the check box Excluded Users and Groups from the above list. By default, it is not selected.
If the check box is enabled but not visible (because you would need to scroll down), a hyperlink Click to view excluded Users & Groups appears alongside the List Items header.
-
Select Exc. user or Exc. group.

If you selected Exc. user:
-
Select the domain from the drop-down list (or "*" for all domains), enter the user name, and click Exclude.
-
Repeat the above step for each user that you want to exclude from the list.
If you selected Exc. Group:
-
Select the domain name from the drop-down list (a specific domain or any "*" domain), enter the group name, and click Exclude.
A selected domain must exist in the predefined Active Directory LDAP Target list.
- Repeat the above step for each Active Directory group that you want to exclude.
The excluded users/groups are displayed in the table, as shown in the following example:

When you have finished defining the properties of the new list, click Save to save your settings.
For information on how to edit existing Lists, see Editing Lists.
For information about duplicating Lists, see Duplicating Lists.
-