Scheduling Reports
Reports can be scheduled to run at specific intervals, and the results can be emailed to administrators or security auditors (SMTP aliases) that need to review them.
To schedule an email report, you must first configure the Console User with an SMTP email address. You must also configure the ITM On-Prem Web Console to use an SMTP server. For details, see SMTP Configuration.
To schedule a report
-
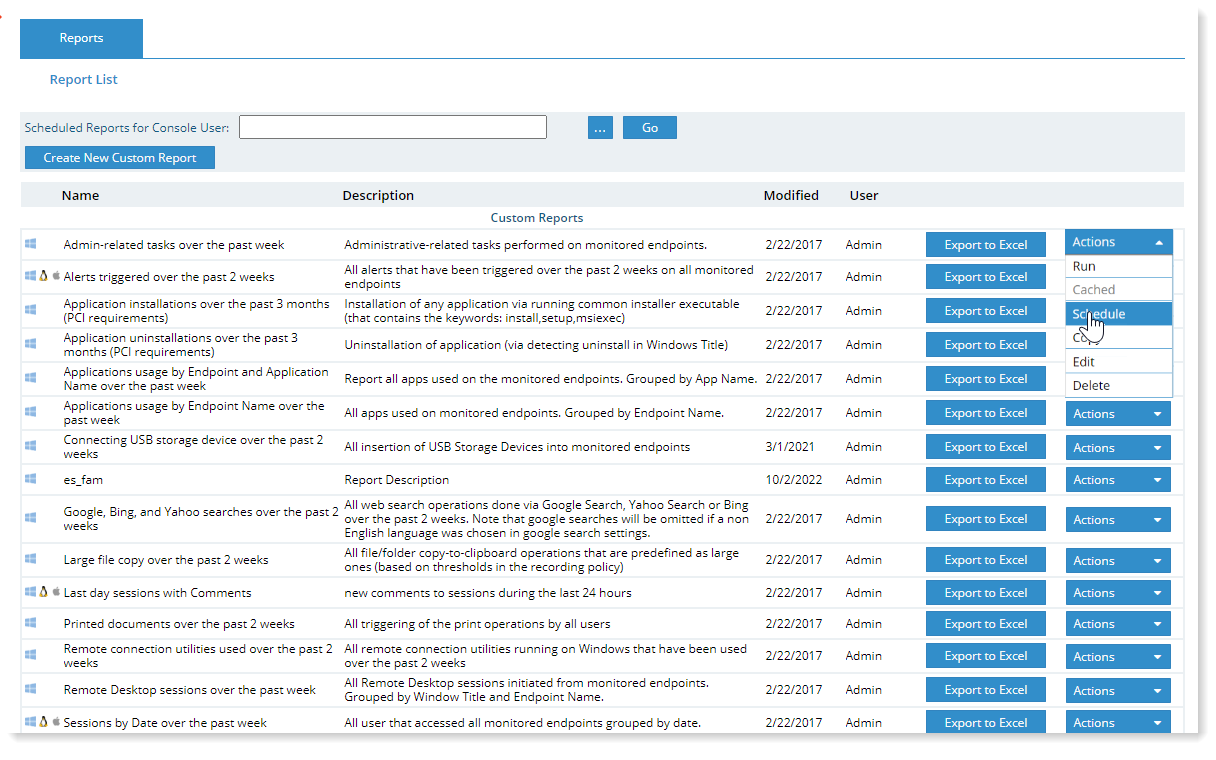
In the Reports tab, click Schedule from the Actions dropdown next to the report you want to run.

-
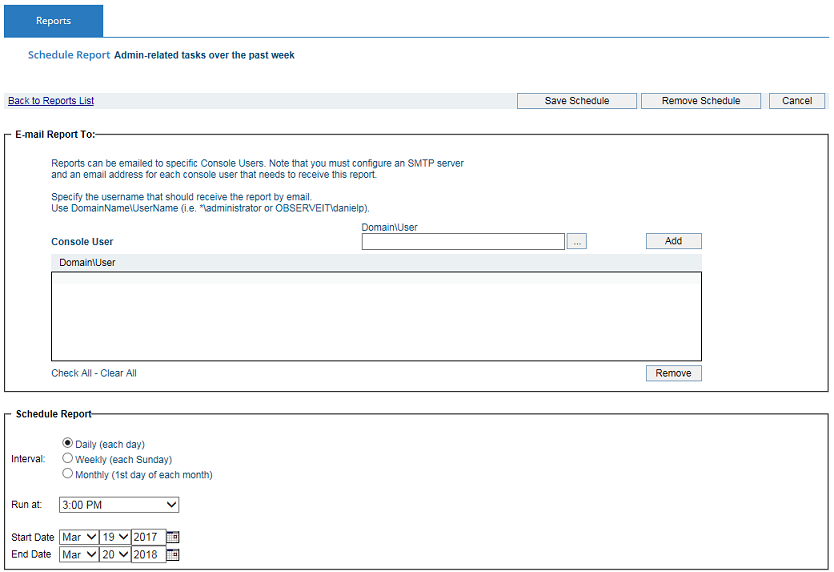
In the Schedule Report page, you can do the following:
-
Assign Console Users to receive the report results by email.
-
Schedule the report to run at a custom frequency or at a defined time range.
-
-
In the Email Report To section, in the Console User field type the relevant domain/user name or click
 to browse and select the user from the Console Users list.
Email reports are sent hourly. To receive an email report, the user must already have an SMTP email address (see SMTP Configuration).
-
To add the user to the report schedule, click Add.
The Console User is added to the email report list. You can add multiple Console Users to the list, and each of them will receive a copy of the report.
-
To remove a Console User from this list, select the check box next to the user you want to remove, and click Remove.
If you click the Save Schedule button at this point, the Console User(s) that were added will receive the report daily.
-
In the Schedule Report section, to schedule the report to run at a custom frequency or at a defined time range, select the radio button next to the required frequency (Daily, Weekly, Monthly).
-
To configure Start/End Dates for the scheduled report, select the start and end dates.
-
When finished, click Save Schedule (at the top of the page).


In the Reports List, a schedule icon appears next to the report's name.
To remove a schedule
-
In the Reports tab, click Schedule from the Actions dropdown nnext to the relevant report (marked by a schedule icon).
-
In the Schedule Report page of the selected report, click the Remove Schedule button (at the top of the page).