Exporting Alerts to a PDF File
ITM On-Prem allows you to export metadata about alerts to a PDF file in order to share real-time information on risky user activity and out-of-policy behavior with other departments/users in an organization or other organizations.
From version 7.12.3, you can export a maximum of 100 alerts. For previous versions, you can export a maximum of 20 alerts.
To export selected alerts to a PDF file
- In the Alerts list, select the alert(s), and click the Export to PDF link above the Alerts list.

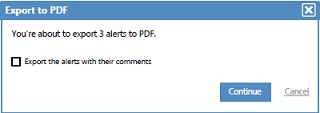
The Export to PDF dialog box pops up, showing the number of alerts that were selected. For example:

If the alerts you are exporting have comments associated with them, you can select to export them with or without their comments.
-
To include comments that are associated with the alerts, select the check box.
- Click Continue.
After a few seconds, a PDF file is automatically created and available for download as a report.

To export all alerts on the current page or on all pages
- Click the selection icon in the header of the Alerts list to select all alerts.

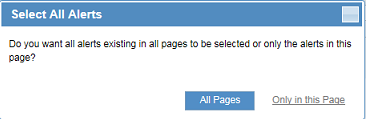
A Select All Alerts pops up asks if your selection applies only to the current Alerts page or to all pages.

- Select All Pages or Only on this Page.
After selecting All Pages, the selection icon will change to
 ; otherwise, it will remain as
  . If not all alerts are selected in the current page, but all the alerts are selected on subsequent pages, the selection icon appears as
  .
. - Click the Export to PDF link above the Alerts list.
The Export to PDF dialog box pops up, showing the number of alerts that were selected.
- To include comments that are associated with the alerts, select the check box before clicking Continue.
A PDF file will be automatically created for all the selected alerts and be available for download as a report.


PDF Report Example
The cover page of the PDF report shows summary information about the risky user activity:
-
Date and time the PDF report was generated
-
Name of the user that exported the selected alerts to the PDF
-
Number of risky users about whom the report was generated
-
The total number of alerts generated for the selected users
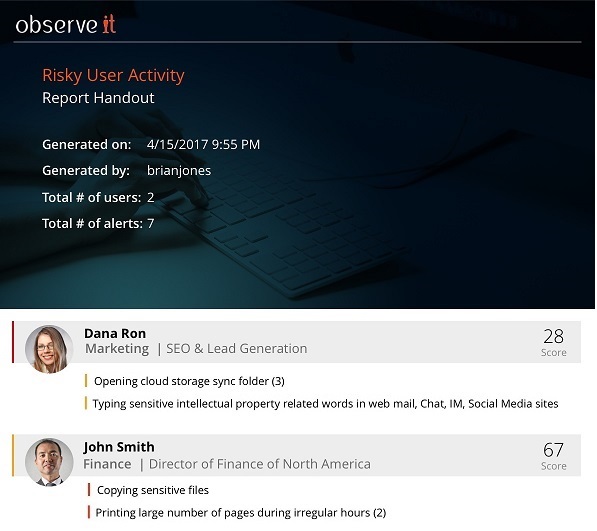
For each user, the cover page shows the following information (as shown in the example above):
- Personal information about the user, such as name, title, department role and personal photo.
When "Anonymization" is enabled in the ITM On-Prem Web Console, personal information that identifies the user is replaced by randomly generated codes (see Protecting the Privacy of Users). If the user's personal information was anonymized at the time the alerts were exported, this personal data will appear anonymized in the PDF report.
-
User risk score (as shown in the User Risk Dashboard).
-
List of user activities with severity levels that caused the alerts to be generated.
The inside pages of the PDF report show the details of the user activities for each user.
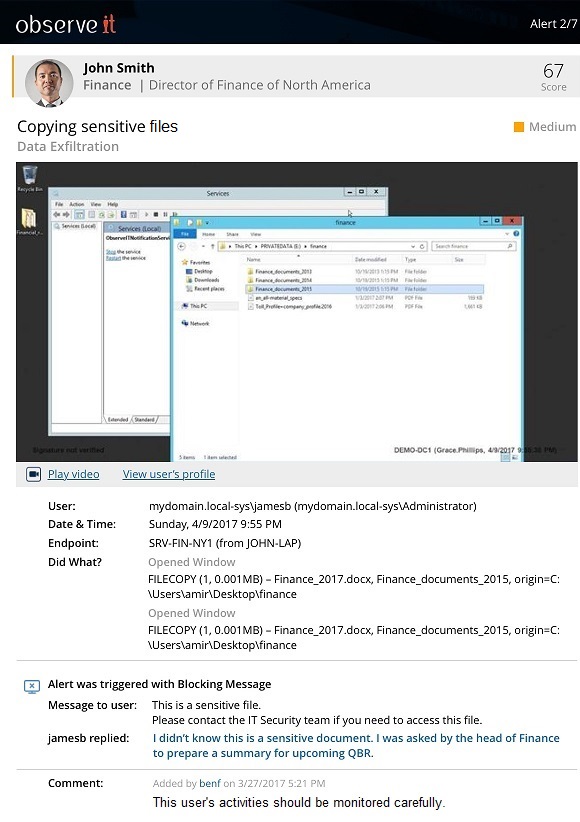
Following shows an example of how John Smith, who is the Director of Finance in his company, appears to have attempted to exfiltrate data by copying a sensitive company file. A screenshot is displayed showing the captured user activity. The alert is of medium severity (color-coded orange).
-
Click the Play Video icon to launch video replay of the session at the point from which the alert occurred. See Replaying User Sessions.
-
Click the View user's profile link to view aggregated information about the user's activities.
The following alert details are provided:
-
User: The user on which the alert was generated.
-
Date & Time: The date and time that the activity occurred.
-
Endpoint: Name of the computer on which the activity occurred.
-
Did What?: What exactly did the user do? In this example, the user ran an application with a window title that includes the prefix FILECOPY.
This alert was triggered with a Blocking Message preventing the end user from continuing with his action. Screenshots were recorded of each user activity following the message display. The end user also provided text feedback to the blocking message explaining his actions. For details, see Blocking Messages.
Comments were also added for this alert. See Adding Comments to Alerts.
Important Note
In cases where Alert properties include strings in Chinese, some of the characters displayed in the generated PDF are replaced with a square mark. It happens only for specific Chinese characters that are not covered in the default font “OpenSans” that is used in the PDF. This issue is resolved by replacing the “OpenSans” font with the “Arial Unicode MS” font that must be purchased and downloaded separately.
To update the fonts used for PDF export:
-
Purchase and download the font from various websites and vendors, such as: https://www.fontsmarket.com/font-download/arial-unicode-ms
- Create 4 copies from the downloaded file (Arial Unicode MS.ttf) with these names:
OpenSans-Bold.ttf
OpenSans-Light.ttf
OpenSans-Regular.ttf
OpenSans-Semibold
-
Get access (RDP or physically) to the machine on which the ITM On-Prem Web Console is installed and browse to the “fonts” folder that by default is located at: C:\Program Files\ObserveIT\Web\ObserveIT\CSS\fonts
-
Overwrite the 4 TTF files existing there with the 4 copies you’ve created in step 2. The PDF generation process will now use these fonts for further exports.