Agent Custom Installation on Windows
This topic describes how to manually install an ITM On-Prem (ObserveIT) Agent on a Windows-based server using a custom installation method.
For details about custom installation, see Custom Installation Steps.
For information about the minimum system requirements for installing ITM On-Prem (ObserveIT) Windows Agent ( see System Requirements for ITM On-Prem (ObserveIT) Components.
In custom installation mode, you can configure advanced settings for the Agent, such as:
-
Agent installation location
-
Recording policy
-
Registration mode
-
Language
-
Hiding the Agent from the Windows Add/Remove Programs
To install the Windows Agent using a custom method
-
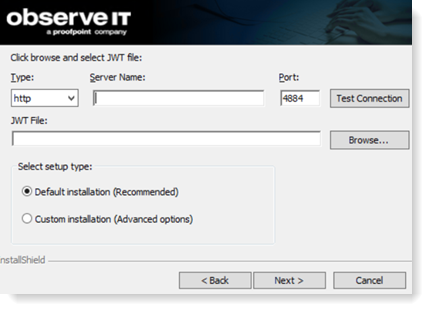
Follow steps 1-6 described in Agent Default Installation on Windows.
- Select the Custom installation setup type.
-
Click Next.
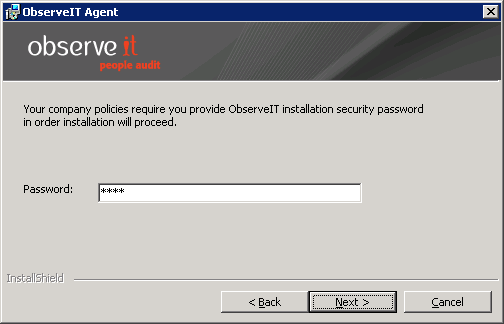
- If the Application Server has been configured to require a security password on installation (see Enabling Installation Security), you must provide the security password in the following dialog box, before proceeding.
- Click Next to continue.
A dialog box opens, in which you can configure advanced settings:

The above screenshot shows the default options when the Application Server is running, and the Agent port is busy.
- Customize your settings, as follows:
Change the default Agent installation path. Click Change and specify a new installation directory path.
If you plan to work in Windows Stealth mode so the Windows agent process are not visible in the Task Manager, do not install ITM On-Prem (ObserveIT) Agent to the System32 folder (C:\Windows\System32).
- Choose the Agent registration mode from the drop-down list:
Registered: The Agent is registered and licensed during installation. This is the default mode when the Application Server is running.
Unregistered: The Agent is not registered during installation. This is the default mode when the Application Server is not running.
Master Image: The Agent is installed without registering with the Application Server. For example, when there is a need to provision a computer with the Agent, and then clone the computer. For further details, see VDI Installation (Cloning or Master Image).
- Define a "Recording policy". For further details, see User Recording Policy (in the Configuration Guide).
If the Application Server is running, you can select a user recording policy from the drop-down list.
If the Application Server is not running, enter a user recording policy in the text box.
- Select the Agent Language from the drop-down list. The default is set to the machine locale; if the machine locale is not a supported language, the default language will be set to English.
Supported languages are: English, Japanese, and German (Agent only).
Define the Agent service port number. The default Agent port is 5050. If the port is busy, you must enter a different number. If the port is not busy, this field is not displayed.
Select the Hide the ObserveIT Agent from Add/Remove programs check box to prevent the ITM On-Prem (ObserveIT) Agent from appearing in the Add/Remove programs list. (This check box is deselected by default.)
- When you have finished defining your custom settings, click Next.
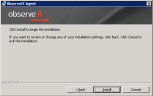
A summary of all your configured settings is displayed. If you want to change any settings, click Back.
- Click Install in the following dialog box to begin the installation.
Installation completes successfully.
- Click Close. Note the Agent’s blue icon in the tray area.
If the Agent installation fails, check connectivity issues.
Hint: Check the Windows Firewall on the ITM On-Prem (ObserveIT) Application Server, and either turn it off or add the relevant rules to allow Agent connectivity (incoming TCP 4884). If required, note the error message and contact Support.In order to verify that user activity recording is working properly after Agent installation, follow the steps described in Verifying Successful User Activity Recording after Installation.
After installing the Agent no reboot is required; recording will start immediately in the current user's session. In some cases, such as on Terminal Servers with multiple concurrent sessions, users that have concurrent sessions will be asked to log off and log back in again before their sessions will be recorded.